How to configure Email Schedule in SwilERP (RetailGraph)
How to configure Email Schedule
How to configure Email Schedule
In RetailGraph, we can set email schedules of transactions, reports, Birthday/Anniversary reminders, user define form, Integration and to do the same, we need to configure Email in RetailGraph and after successfully configuring Email, we can set the required schedules in RetailGraph.
How To Configure Email in Retail Graph
(Start ->Tools ->Send Email)
After that, we need to do the following steps:
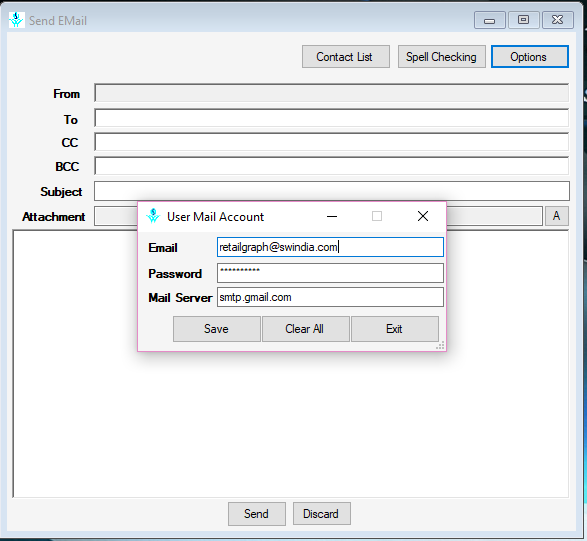
Step 1: Go To Options As per shown Image.
Step 2: Over here, need to put Email In Email field from which, mails will be sent.
Step 3: Need to put the Password of Email in Password filed.
Step 4: One needs to put Email Server (smtp.gmail.com,smtp.mail.yahoo.com) as per the mentioned email id. Email servers may vary according to Email ids :
Step 5: Save this User Mail Account window.
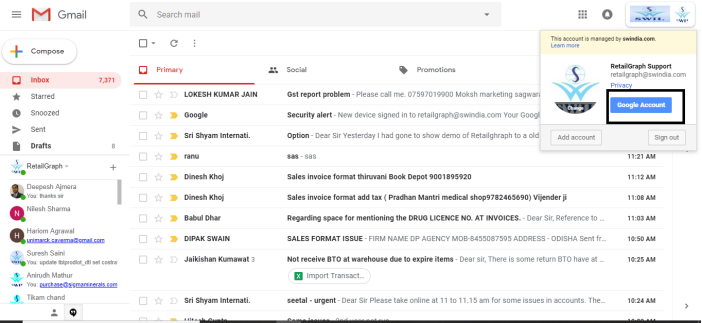
Step 6: One needs to log in his/her Email in Google chrome or in any web browser.
Step 7: Need to go to Google Account as shown in the below image.
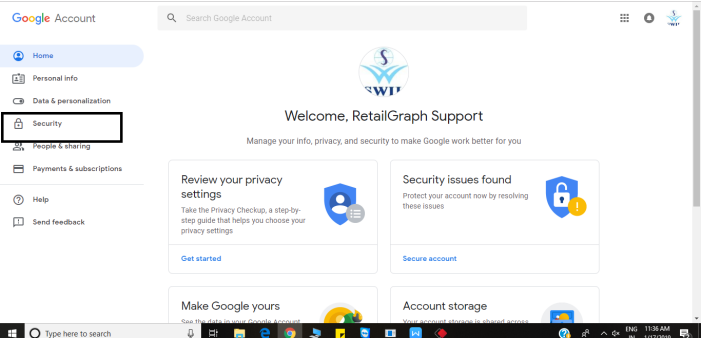
Step 8: Go To Security As show in This image
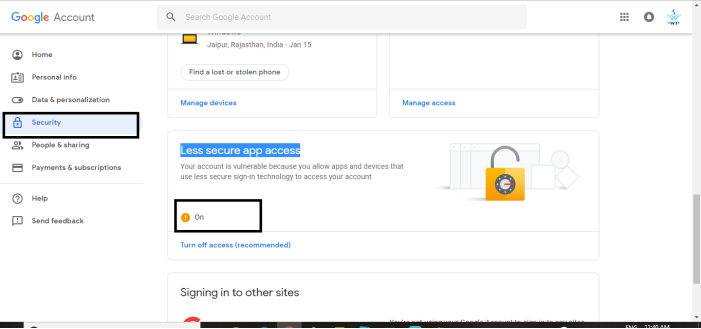
Step 9: Please check “Less secure App Access ”
Step 10: Less secure App Access should be always “ON”
Step 11: After making the above changes, need to go to Start>Tools>Send Email. Over here, we can check out if it is working or not by sending a test mail.
After checking that mails are being sent, now we can set the schedule.
How to Create Email Schedule for transactions.
How to Create Transaction Email Schedule
(Start ->Tools ->Schedule SMS/Email)
Please follow the steps given below:
Step 1: Schedule For Select for “Transaction ”
Step 2: Select “Email” In Schedule Column.
Step 3: Select the Transaction Name “Sales invoice ” in the Transaction/Reports Column.
Step 4: Please Check Mark in Send in Attachment.
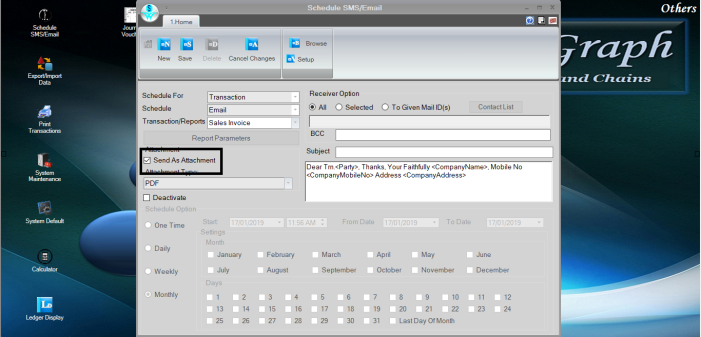
Step 5: Please select Attachment Type in Attachment Type Column As Like (PDF,EXCEL,HTML,XML).
Step 6: Save It.
Now after saving a Sales Invoice bill, the Customer will receive an Invoice copy in PDF if email id is mentioned in customer As Shown in the below image :
How to Create Email Schedule for Reports
How to Create Email Schedule for Reports
(Start ->Tools ->Schedule SMS/Email)
Please follow the steps given below:
Step 1: Schedule For Select for “Reports ”
Step 2: Select “Email” In Schedule Column.
Step 3: Select Reports Name “Product Wise Sales Reports ” in Transaction/Reports Column.
Step 4: Please Check Mark in Send in Attachment.
Step 5:Please Mention Email Address in Receiver Options.
Step 6: Go To Reports Parameters
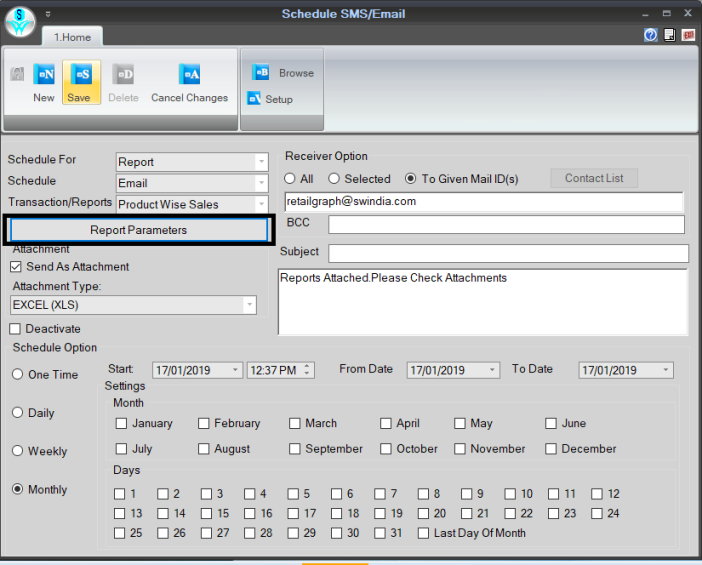
Step 7: Select Reports Type As per shown Image
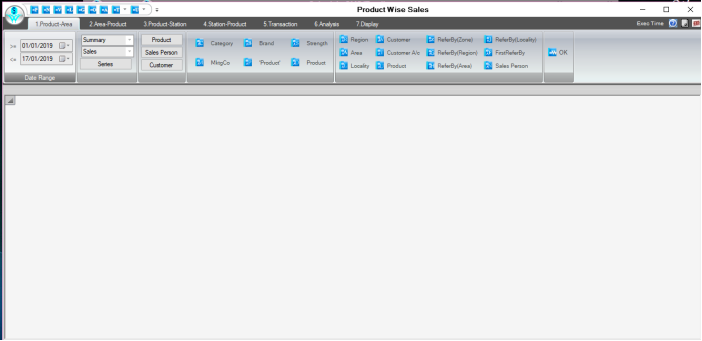
Step 8: Click “OK” Options
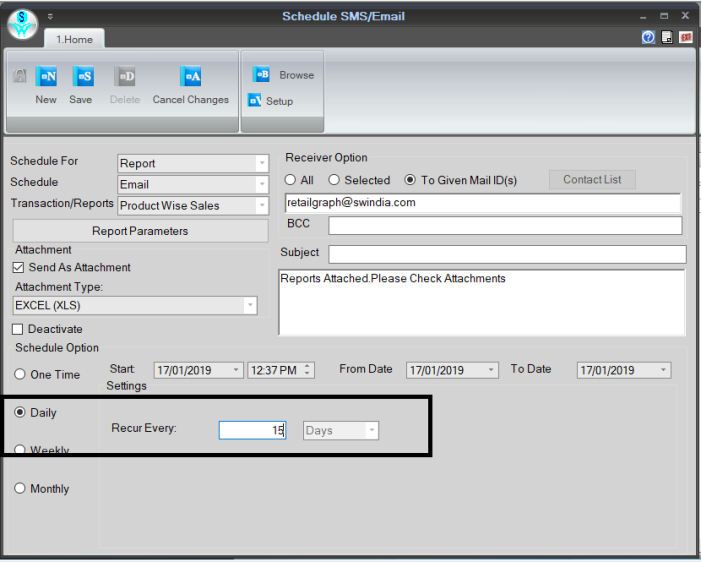
Step 9: select Schedule Options Such as Day Wise, Weekly Wise, Monthly Wise according to one’s requirement.
Step 10: Save It.

|


|
Related Articles
How to Allow IMS Integration Process in SwilERP (RetailGraph)
How to Allow IMS Integration Process in SwilERP (RetailGraph) How to configure IMS Integration 1. You need to select IMS integration in system default. 2. After it please exit retail graph and login in again.if you have Store Head rights then IMS ...Stop Email/SMS/WhatsApp Scheduling in SwilERP
How to Deactivate Email/SMS/WhatsApp Schedule in SwilERP SwilERP allows users to schedule reports and transactional data via Email, SMS, or WhatsApp. However, if you no longer need a scheduled report or notification, you can easily deactivate it. ...Email Automation in SwilERP Enterprise
How to Automate Emails in SwilERP Enterprise Software What is email automation? Email automation is a way to create emails that reach the right people with the right message at the right moment without doing the work every time. With email ...Create SMS Schedule
How to Create SMS Schedule Through SwilERP SMS Scheduler is an automated tool that sends the text messages you wrote after a certain period with a specific frequency. It helps you remember important dates and prevents you from forgetting birthdays ...Schedule Customer Outstanding Report
How to Schedule Customer Outstanding Report in SwilERP In SwilERP, there is an option to schedule customer outstanding report on daily basis. With this option, users can share day to day outstanding report via Email. Users can find this feature in ...