View Product Wise Reports
How to View the Product Wise Profits Report in SwilERP
Every business wants to know which products are making good profit and which are not, in terms of profitability for a specific duration. It is tough to find profitable products from large product stock. By product-wise profits report, users can identify the product profitability.
In the SwilERP software, there is an option to view the Product wise profits report. In this report, an analysis option is also given to analyze the data to get to know profitability. This Analysis and Profits Report provides detailed information about Product name, Sales value, Cost value, Margin, and Margin in percentage. Read this article carefully, and you will know how this report can be viewed.
Strat with Login in the SwilERP dashboard to initiate the process:
- Go to the Reports menu.
- Select the Profit Reports > Product Wise Profits.
Reference window: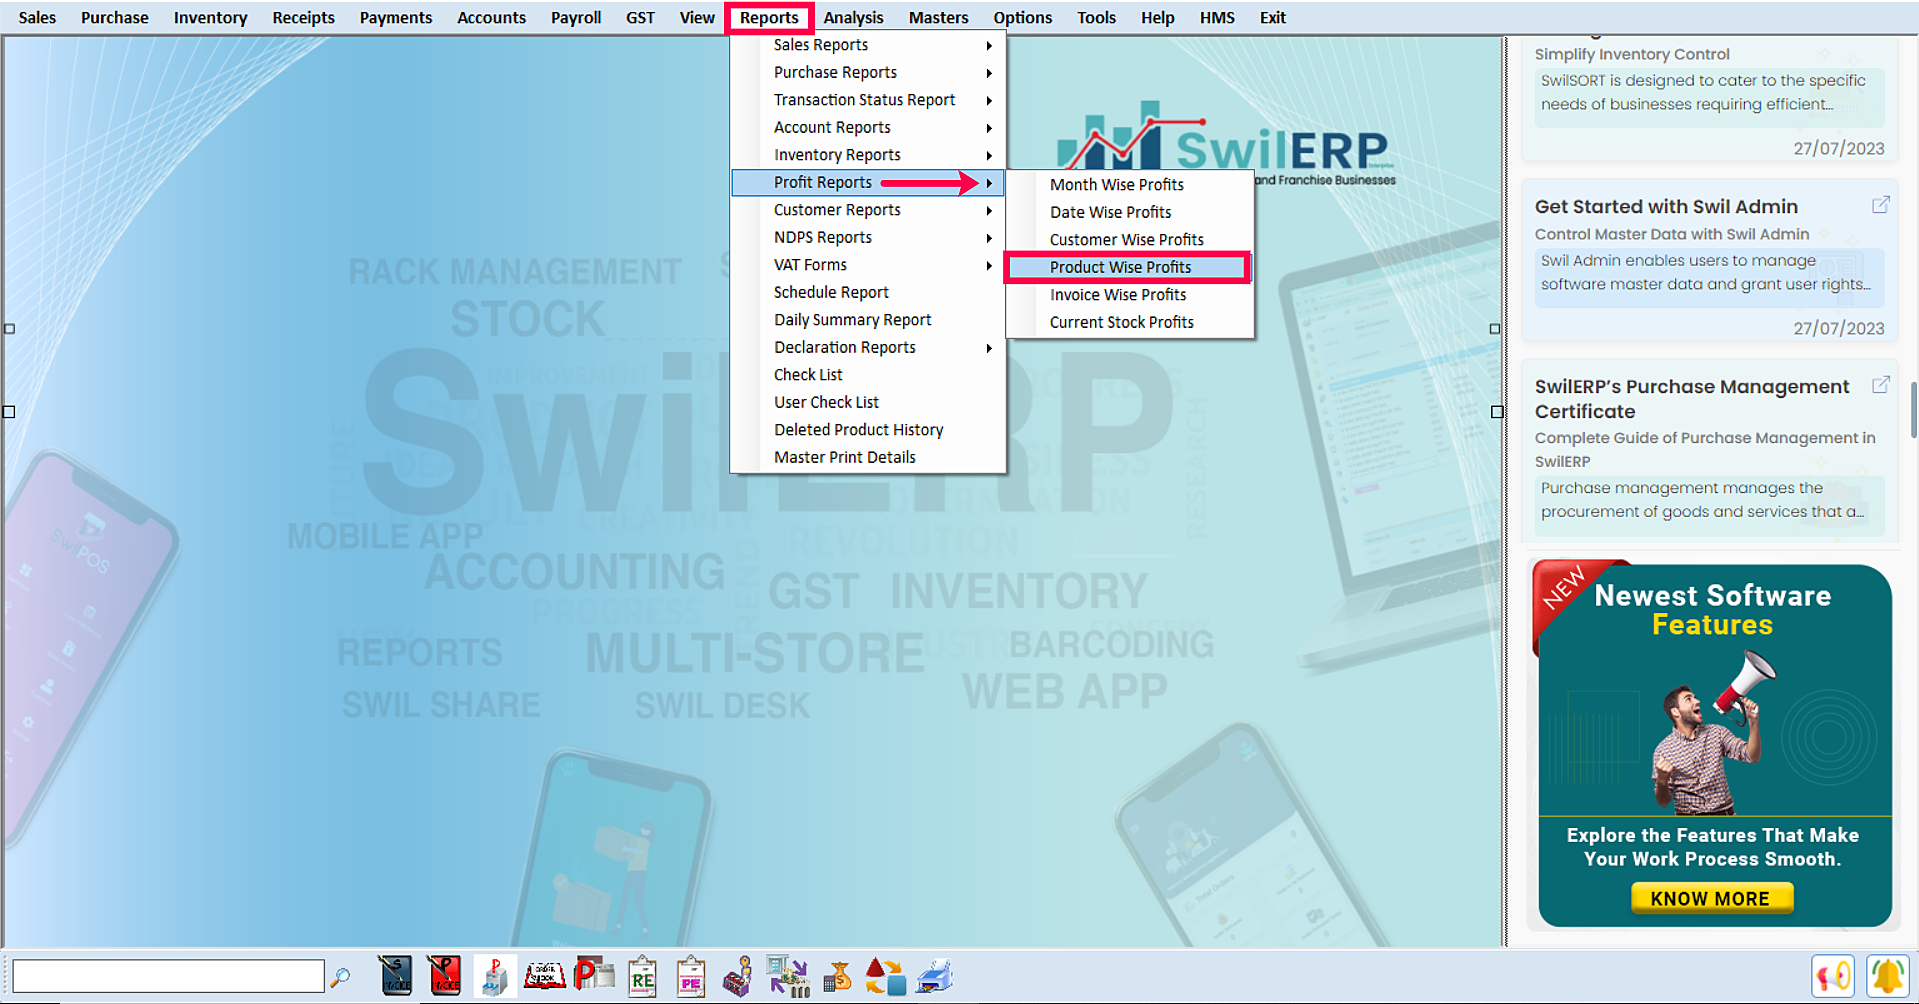
SwilERP Dashboard Window
How to view the report:
- Firstly select the Home tab.
- Enter the Date Range 'From to To.'
- If required, tick the mark in the Deduct Return/Deduct Cash Discount boxes.
- Select any option in Summary / Detail / Month Wise / Day Wise in which you want to view details in your report.
- If you want to apply a filter, you can use it in the Product tab.
- Click on the View tab.
Reference window: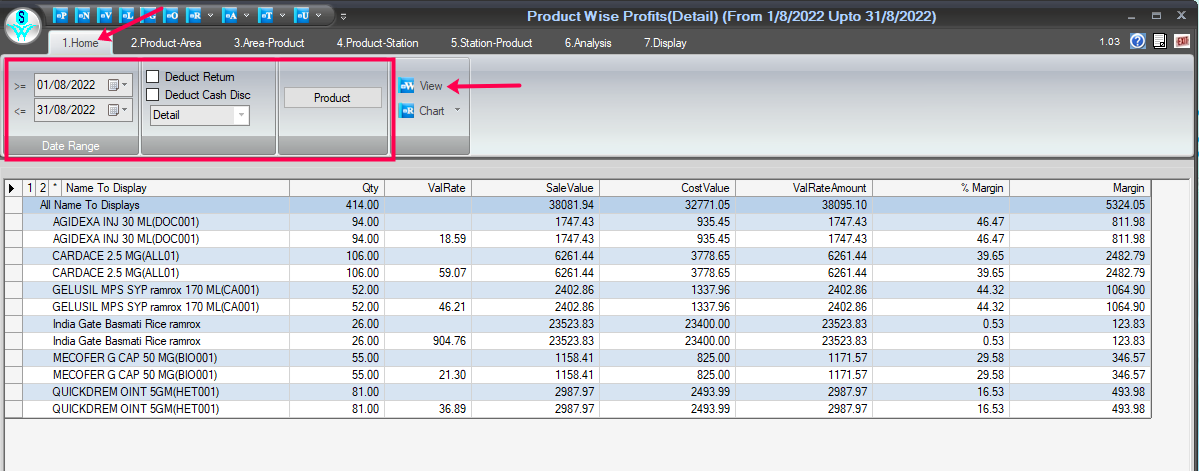
Report Window
How to convert the report in the Chart format:
- From the Home section.
- Click on the Chart tab and select the Chart to which you want to convert the report.
Reference window: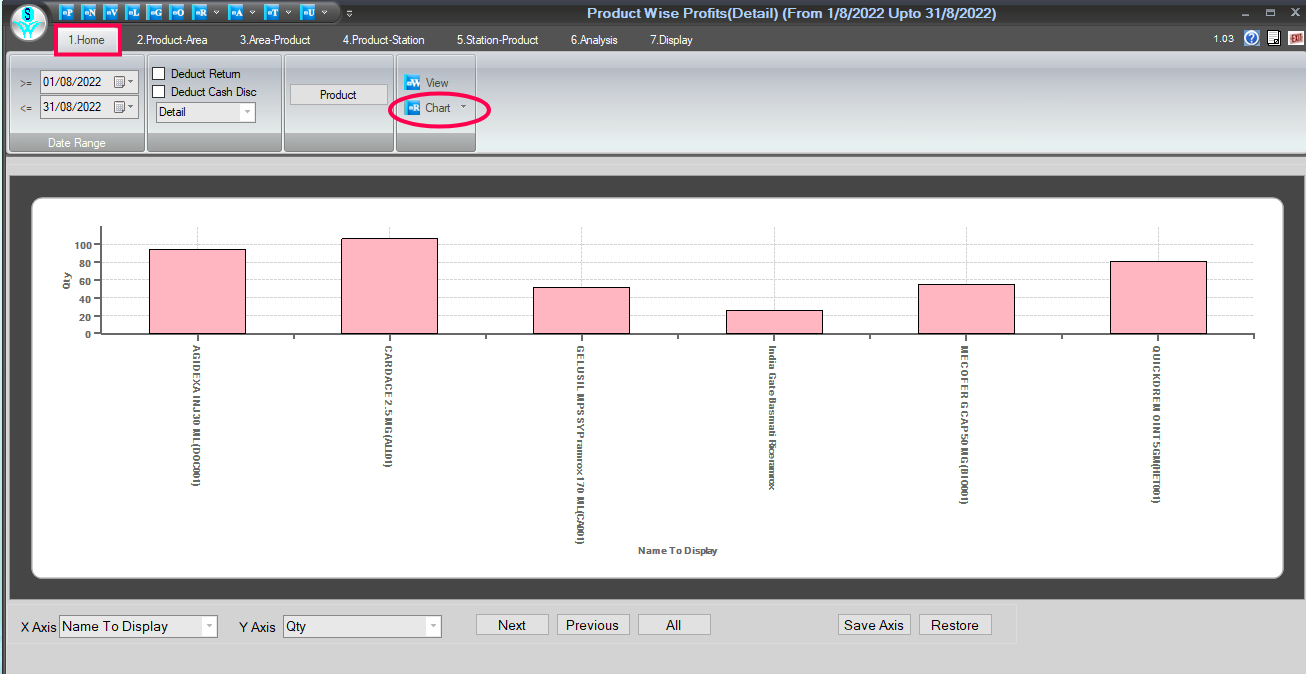
Chart Tab Window
To view the additional details in the report:
If the user wants to view some other additional details in the analysis report, then they can select the below steps:-
- Select the Area-Product section:-
- According to the user's requirement, if users want to view details Area-wise, then they can select the below-mentioned options-
- Region
- Area
- Sales Person
- Locality
- Customer
- Refer By (zone), etc.
- If the user wants to view the analysis report Group-wise, they can select the options below according to the requirements.
- Category /Brand /Product/Strength/Generic/Schedule, etc.
- After following the above steps click on the View tab.
Reference window: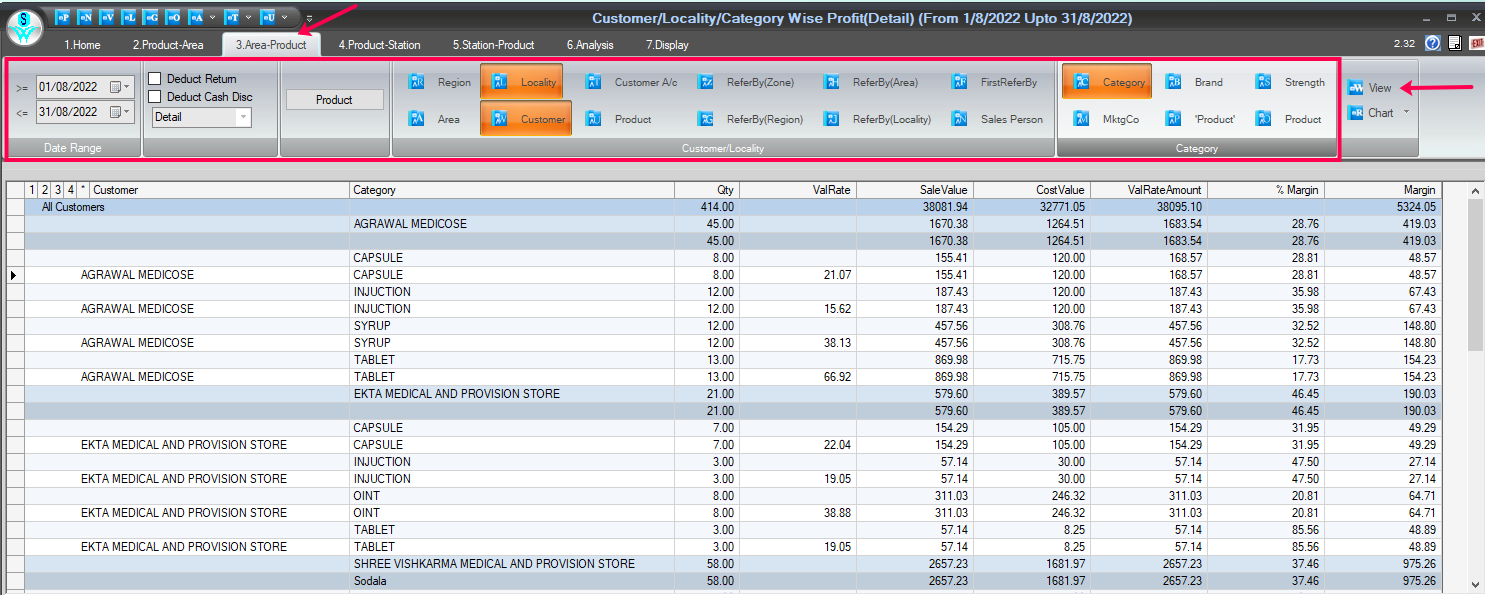
Report Window
Select the Station-Product:
- If the user wants to view details as the Station-Product wise, then they can select the below steps:
- Country
- State
- District
- Station
- Customer
- First ReferBy, etc.
- Sales Person
- Customer account
- After following the above steps click on the View tab.
Reference window:
How to analyze the details:
- Go to the Analysis tab.
- Select the Date Range from which you want to view data.
- Click on the View tab.
- Use the field list to arrange fields in a Pivot Table.
- After choosing fields, you will see the data in Analysis Grid.
- Enter the name and click on the Save tab to save this report.
- If you want to open the previous report, enter that report name and click on the Open tab.
- Users can Remove/Export, and Import the report as their requirement.
- You can set Grid as per the requirement.
How to use the Areas Section:
- Use the areas section (at the bottom) of the field list to rearrange fields the way you want by dragging them between the four areas.
- Fields that you place in different areas are shown in the PivotTable as follows:
1. Filters2. Columns3. Rows4. Values
Reference window: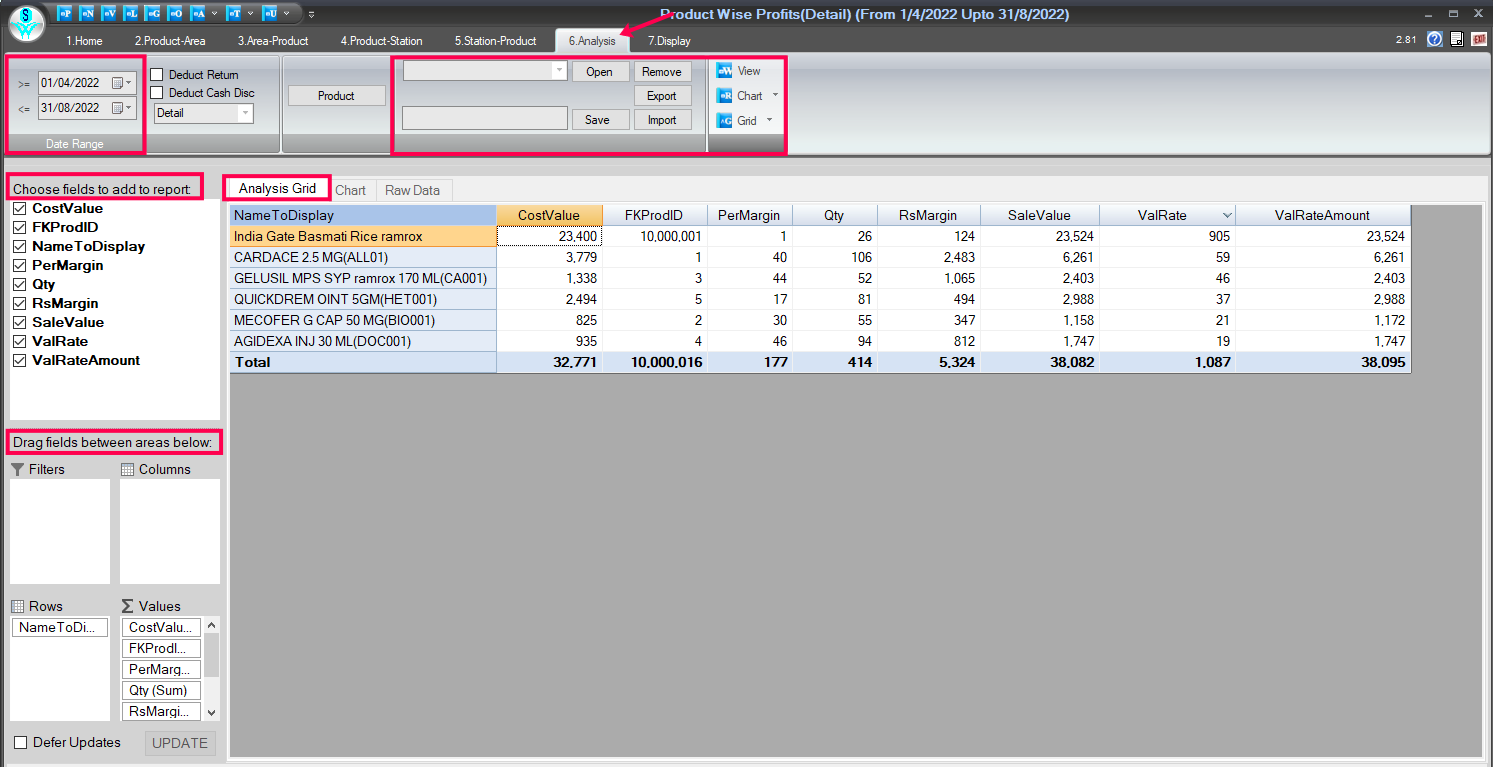
Analysis Tab Window
How to view the Analysis data in chart form:
- After analyzing the data, if you want to view the details in the chart form, click on the given chart option.
Reference window: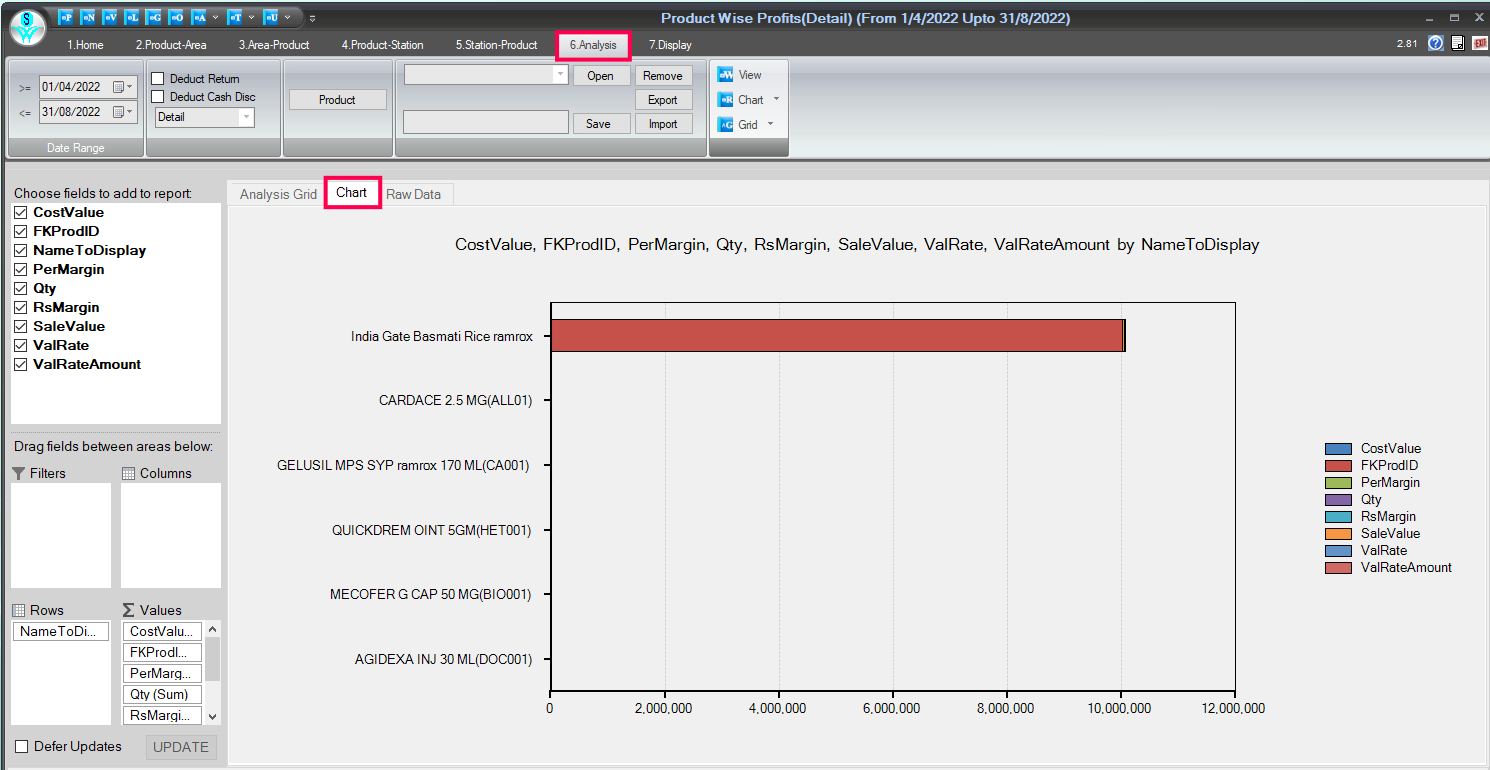
Window of Analyze Data in Chart For
How to view the Raw data details in the same window:
- Click on the given 'Raw Data' option to view the raw data of stock.
Reference window: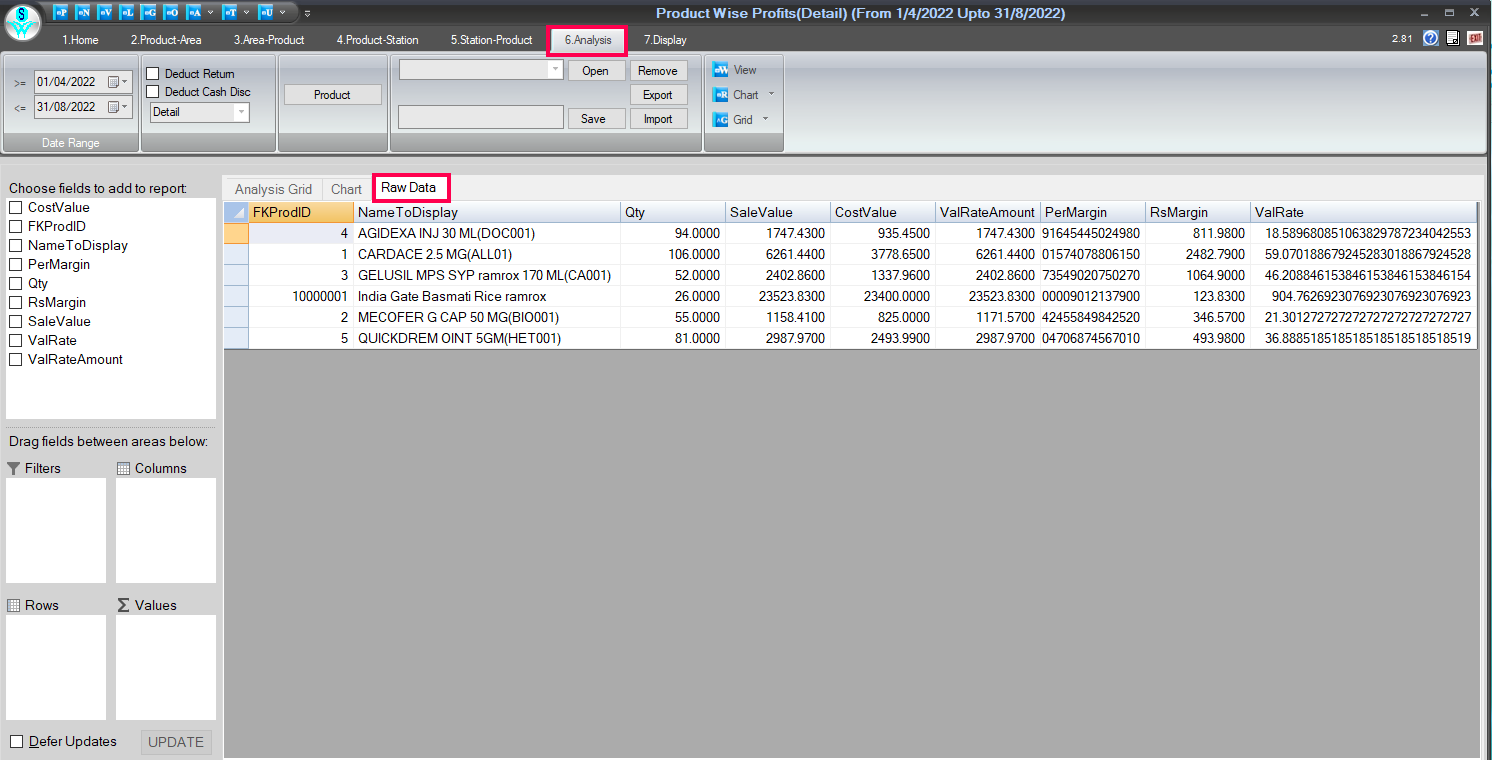
Raw Data Tab Window
How to Print/Preview and Export report:
If the user wants to take a Print and Preview of this report and convert it into Excel format, follow these steps:
- Go to the Display tab.
- Click on the Print and Preview tab to print your report.
- The user can convert this report into Excel, Text, PDF, or HTML format from the 'T' point.
Reference window: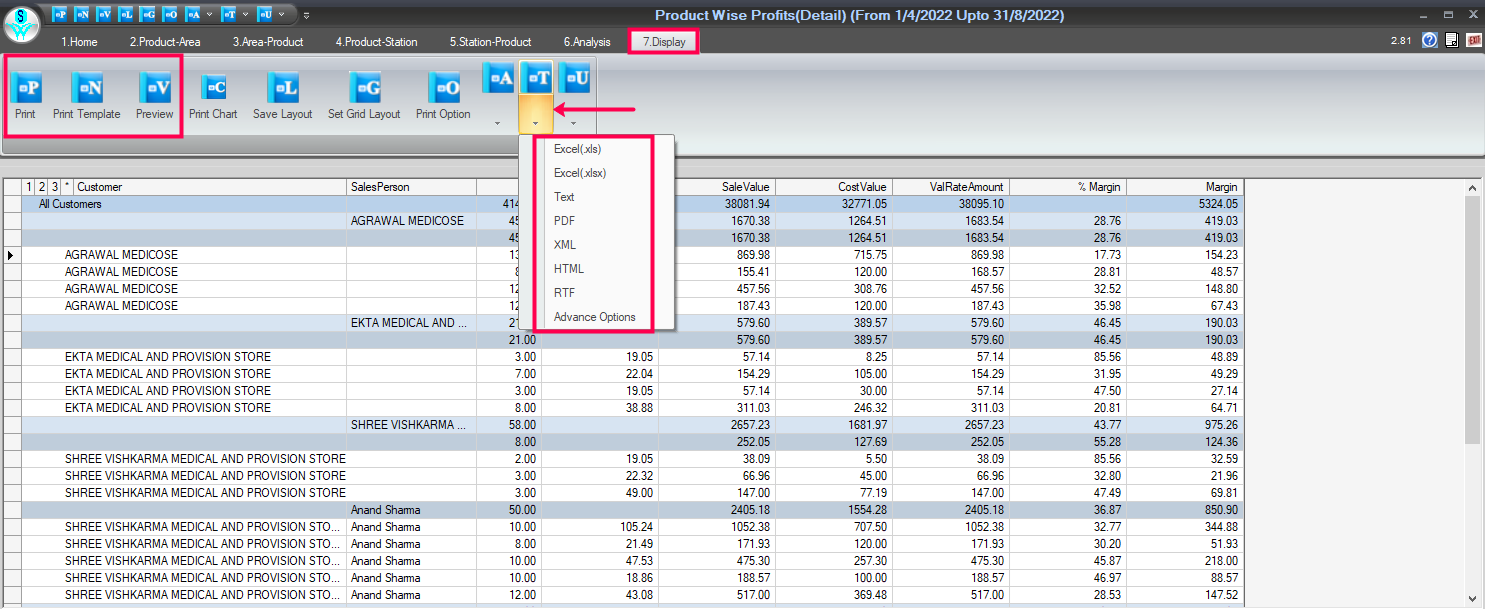
Print-Preview & Export Tab Window